automated proxies with NordVPN Mac
tl;dr: how to use a cheap personal VPN for scraping (code here)
cost: $0 (+ NordVPN free trial or subscription of your choosing)
build time: 15 minutes (MVP)
disclaimer before jumping into this
This post and my work are not sponsored by Nord. I've found it nice to work with. You could use the OpenVPN/Tunnelblick parts of this with other VPN providers, but the code and setup will not transfer 1:1.
intro
Small scale scraping is the bread and butter of growth-minded engineers.
The energizing greenfield work and short MVP times are fun - until suddenly the architecture needs to scale.
This post makes no effort to break apart the large DevOps undertakings of large-scale scraping; instead, we'll cover how to delay that large undertaking by using the cheap consumer VPN Nord as an automated proxy rotation service.
(From experience: commercial proxy providers can be substantially more expensive and frustrating, particularly on small projects)
NOTE: If you are using Windows or Linux, Nord provides a native command-line interface that you should use instead of this guide. There are several mature OSS projects that add additional functionality, as well.
table of contents:
- sign up for Nord
- download Tunnelblick
- install Tunnelblick
- pull automation code
- pull Nord server config files
- add desired config files
- add Nord Service Credentials
- controlling Tunnelblick
- automating Tunnelblick
sign up for Nord
They have a 30-day free trial and various paid plans. If you're ready to commit, buy one with an affiliate link from your favorite YouTuber for a discount (& to support their channel).
Best price I've seen (in 2018): 3-year plan for $89 ($2.47/mo).
Of particular note: I've yet to observe meaningful request number, data volume, or throughput caps or throttling.
download Tunnelblick
Tunnelblick is free software for OpenVPN on macOS; you can download it for free here.
Nord supports the OpenVPN protocol - with Tunnelblick and some hacky AppleScripts, we can built the Mac CLI they don't offer¹.
install Tunnelblick
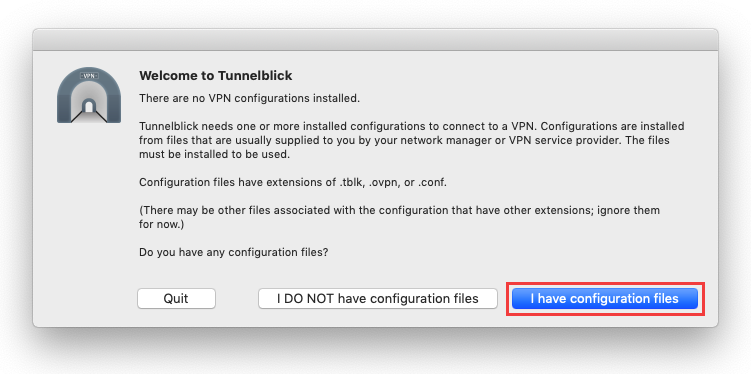
Here we briefly regain proper documentation - head over to this Nord article if you want a step-by-step guide for executing the downloaded Tunnelblick .dmg file (you can skip steps 2&3 for now).
Once you've gotten to the step that says "I have configuration files", let's fetch the automation code and all of NordVPN's servers config files.

pull automation code
Assuming you have the Github CLI set up², simply run:
gh repo clone alecbw/NordVPN-Automation-Mac && cd NordVPN-Automation-Mac
pull Nord server config files
When you use the traditional Nord desktop application, the notion of configuration for each proxy server is abstracted to you - you just click a country or Quick Connect and Nord picks a server and applies the config for you.
In lieu of that nice UX, we are going to pull the configuration files of all Nord active servers as a .zip by running:
mkdir ovpn && cd ovpn
sudo wget https://downloads.nordcdn.com/configs/archives/servers/ovpn.zip
unzip ovpn.zip && rm -rf ovpn.zip
cd ..
This will download, unpack, and delete the ovpn.zip file; you should end up with a folder called ovpn.
add desired config files
Nord comes with ~6,000 servers, with one file each for the UDP and TCP connection configuration.
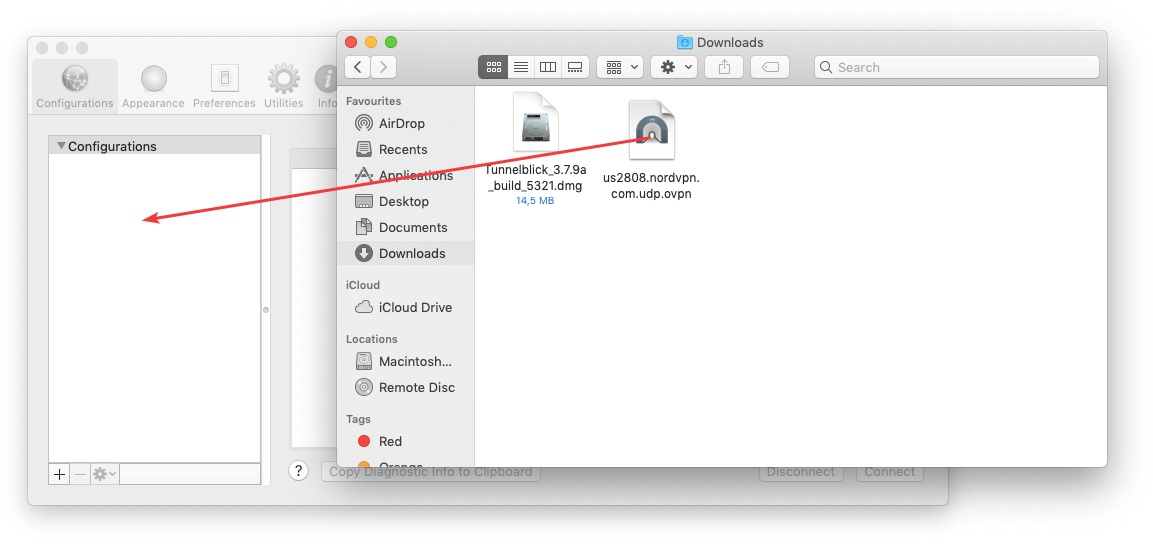
You most likely don't want to use that many - geographically distant servers will add latency & timeout risk - so select the 1 or more servers you want and drag-and-drop those into Tunnelblick.
Each server config file is prefixed with its country-code and suffixed with its TCP or UDP support.

Each time you add 1 or more config files to Tunnelblick, it will prompt you for your computer's username & password, so I strongly recommend doing many at once.
add Nord Service Credentials
Each configuration file also needs your account Service Credentials (note: not the username and password you just created) to actually access the proxy server.
You get them from the Nord web dashboard.
To avoid having to manually set the Service Credentials for potentially-hundreds of servers, we can do so by setting them as environment variables:
export NORD_USER=ieWLHwnd6tdcHAYOjK9Ma3WK
export NORD_PASS=UZHXcDYkNvJezirPQJuNeu2Y
Note: both of the above are made up for the sake of example
The provided automation script will use those environment variables to automatically authenticate each proxy server before connecting to it.
controlling Tunnelblick
Tunnelblick exposes some functionality to automation with their AppleScript support.
Some commands (using AppleScript from a bash console) of note:
List supported server configurations (that you have drag-and-dropped):
osascript -e "tell application \"/Applications/Tunnelblick.app\"" -e "get configurations" -e "end tell"
Start a connection to a given server by referencing its name:
osascript -e "tell application \"/Applications/Tunnelblick.app\"" -e "connect \"us1000.nordvpn.com.tcp\"" -e "end tell"
Check status of active connection:
osascript -e "tell application \"/Applications/Tunnelblick.app\"" -e "get name of first configuration where state = \"CONNECTED\"" -e "end tell"
Disconnect from all connections:
osascript -e "tell application \"/Applications/Tunnelblick.app\"" -e "disconnect all" -e "end tell"
(you can also manually connect and disconnect by clicking the menu bar icon for Tunnelblick)
automating Tunnelblick
The provided script allows you to automatically rotate proxies. You choose the refresh_rate value, and it will randomly pick a value between 1 and refresh_rate and rotate in that many minutes.
To run, simply open a terminal tab and run the following:
python nordvpn_automation.py -refresh_rate 20
One last item of note: Tunnelblick disconnecting can take 2-3 seconds. There are two consequences of this:
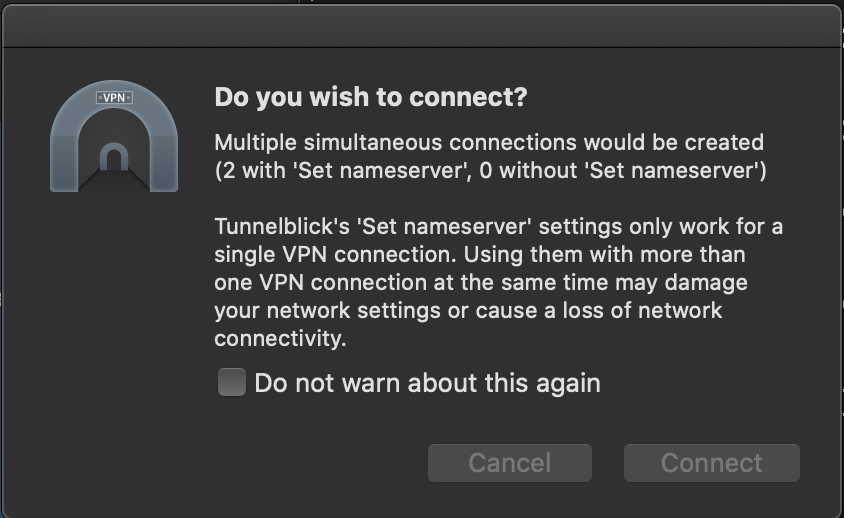
a) There will be brief moments where two connections are running simultaneously. Tunnelblick will prompt you each time this happens. I recommend you select to not prompt you in the future:

b) It is quite possible your IP address will leak during the transition if a request goes out during that time. As with all things, be sure that is an acceptable risk for your goals.
Postscript: Tunnelblick has an annoying habit of launching automatically at login, and is not present in the standard Login Items system preferences menu. You can disable this behavior by running
defaults write net.tunnelblick.tunnelblick doNotLaunchOnLogin -bool yes
¹ I asked their team - they don't support a Mac CLI and have no timeline to add support
² If you don't, you can download the repo from Github by clicking Code -> Download Zip
Thanks for reading. Questions or comments? 👉🏻 alec@contextify.io