set up email sending (anywhere)
tl;dr: How to set up AWS Simple Email Service, through which you can send emails via many invocation methods
cost: $0 per first 62k emails/mo
build time: 60 minutes (MVP) + 2 days wait to get out of sandbox
Every SaaS product at scale leans heavily on email for signups, transactional updates, engagement, and cross-sale. AWS SES offers a convenient, dev-first approach to sending any type of email. To set it up, you'll need to:
- Buy a domain. I used Namecheap; you can use any registrar. If you're not currently using one, try AWS Route53, as it's the easiest to connect.
- Connect the domain to SES. You'll need to modify the DNS settings of the domain. No worries if you're not familiar with doing so, I'll cover it below
- Validate that the domain verifies successfully
- Create a support case to remove your account SES from Sandbox Mode
- Send your first programmatic SES email (code sample included)
#1 - buying a domain
Try to use the root of your main brand (e.g. Contextify is my consulting biz). You can then use an alternate TLD (top level domain) like www.contextify.email. Tools like DomainHack help find appropriate TLD combos.
# 2 - connecting your domain
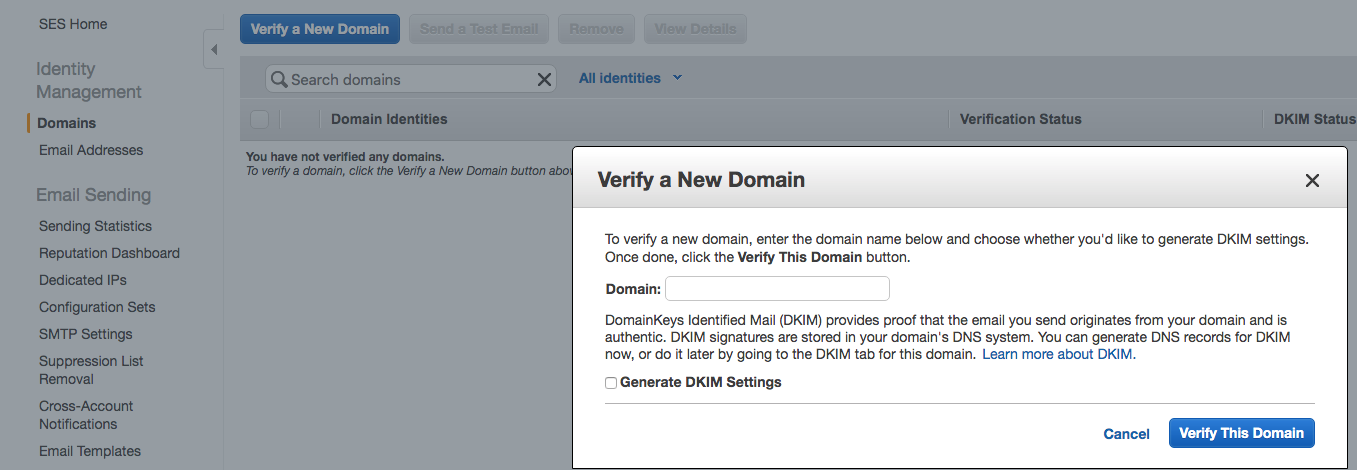
Go to the SES console (I'm assuming you've already set up your AWS account). Not every Area Zone is available for SES; I use us-west-2. Use whatever's geographically closest if your default is not available. Click Verify A New Domain to start the process, and select the Generate DKIM Settings option, as this will ensure we have good email deliverability.
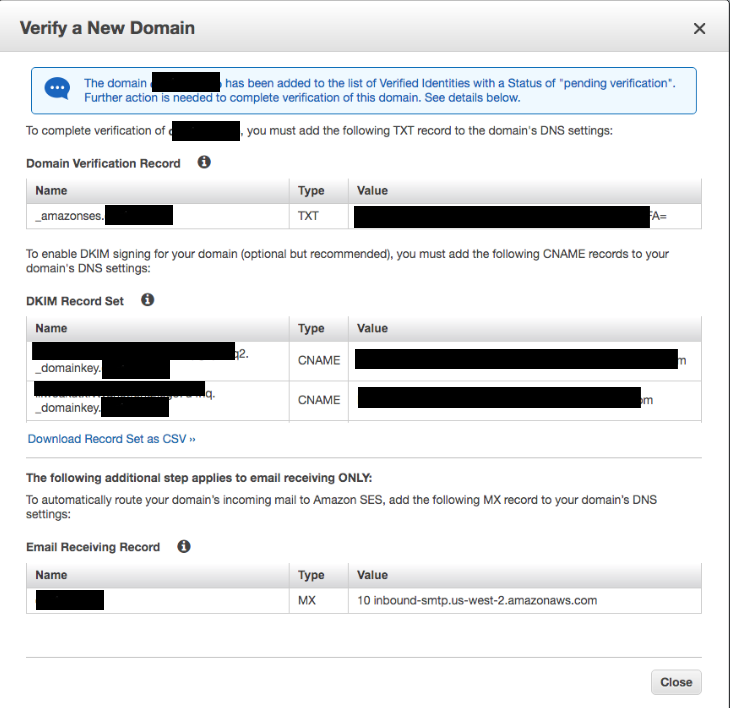
AWS SES will generate a series of DNS records - 1 TXT record and 3 CNAME records (for DKIM). Add these to the platform where you bought your domain.
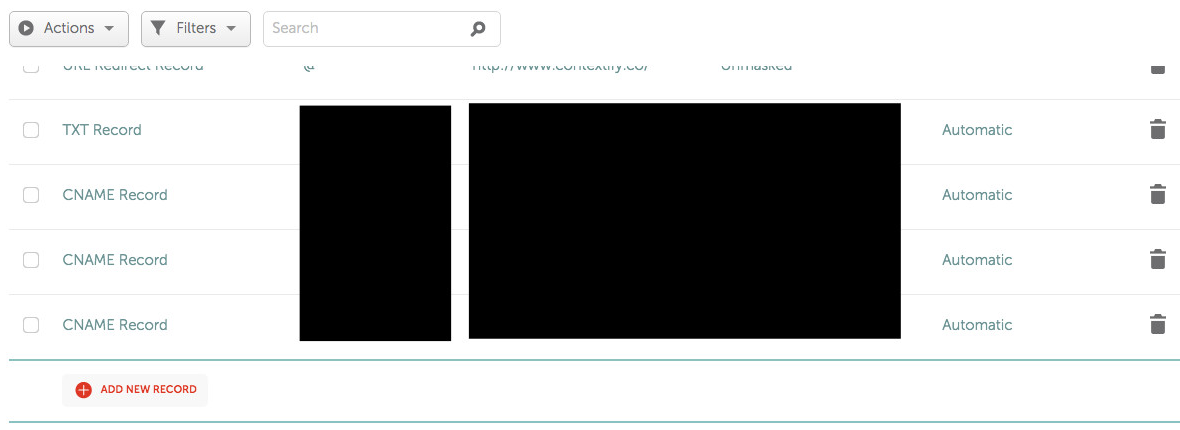
For Namecheap, this looks like:
#3 - validate the domain added successfully
The dashboard you just used to add the domain will have a status field for verification. It should update to Successful in < 30 min (DKIM may take 30m - 6 hours). It will wait 72 hours before declaring it unsuccessful.
For some providers (like Namecheap), you'll have to edit the records to remove the domain appended at the end, as the registrar automatically appends the domain. If the dashboard doesn't show success in an hour, try this next.
TXT record Name: _amazonses.contextify.email => _amazonses
#4 - Once the domain is validated, you'll need to create a support case to remove it from Sandbox Mode. To use it in Sandbox, you have to whitelist both sending and receiving emails. This links to the support console.
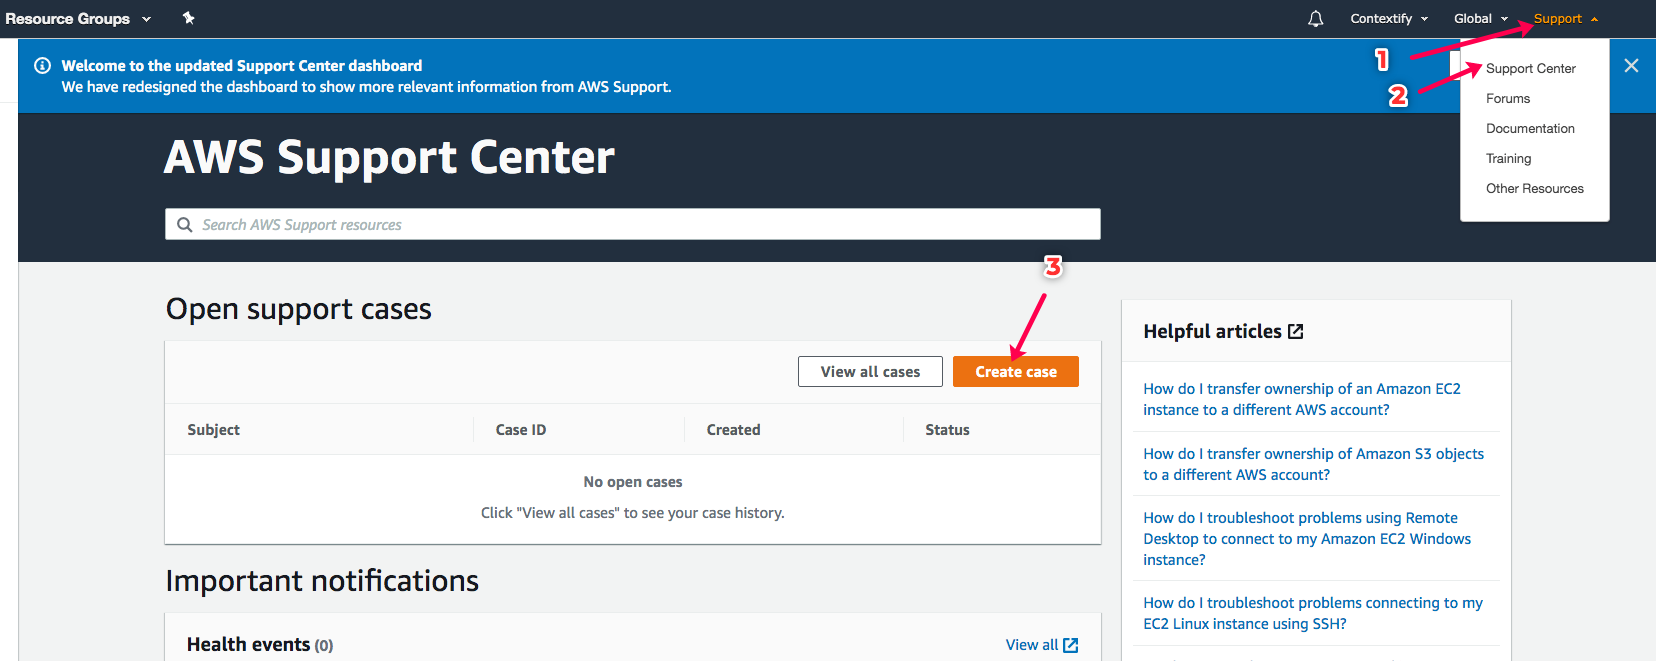
The contents of what you include in the case are not super important. Here's what I used:
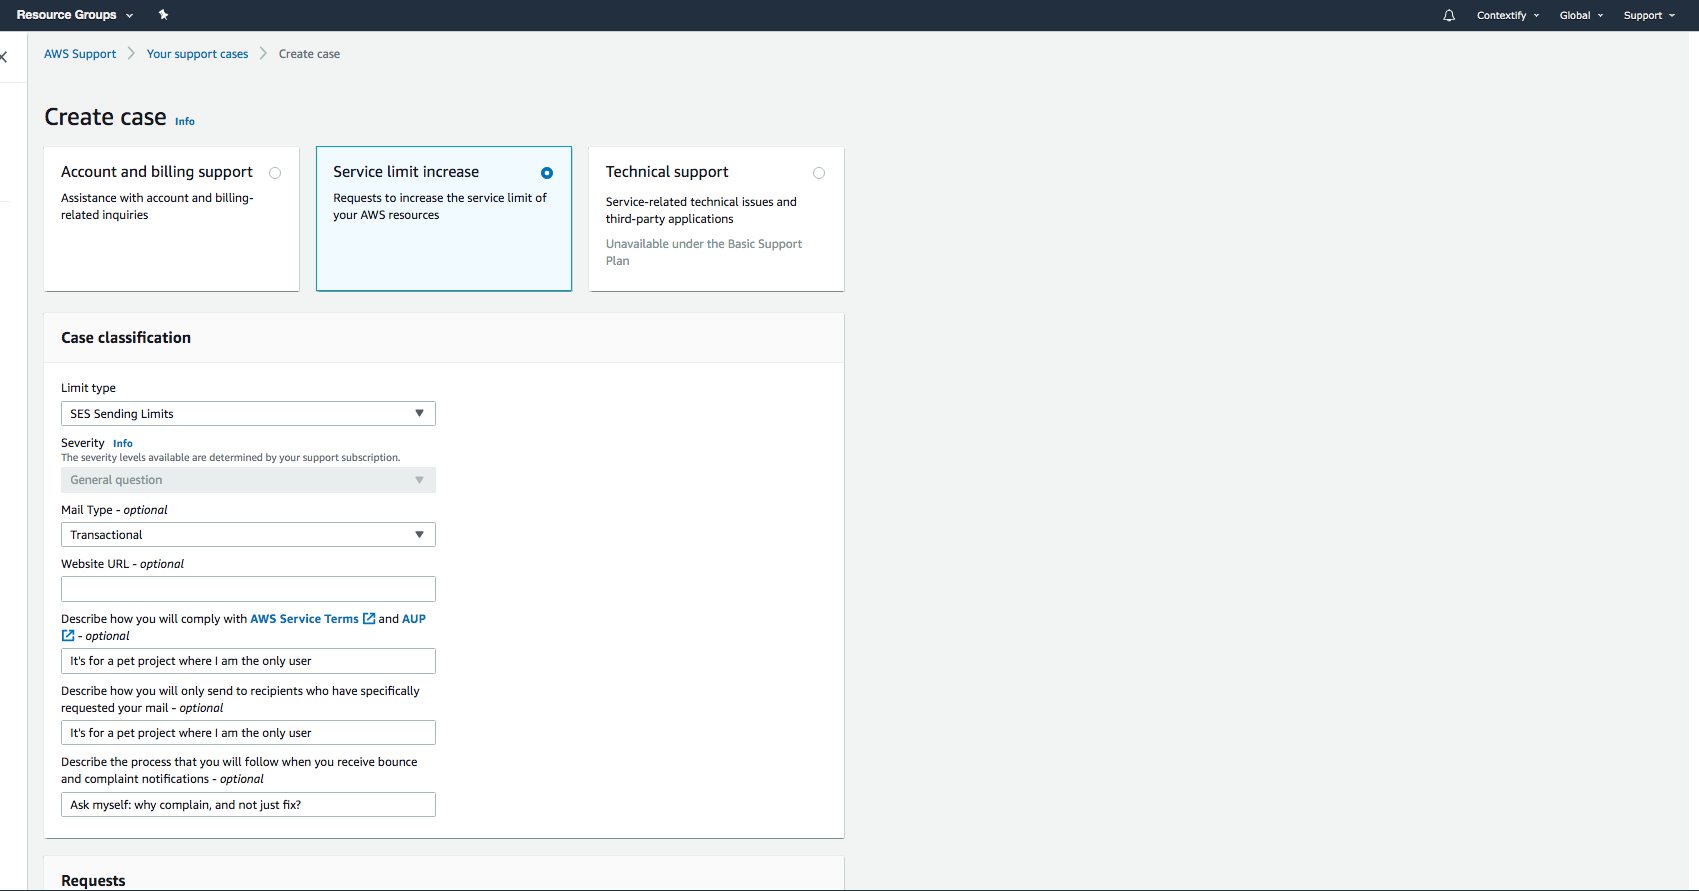
I submitted my application at 4:50pm on a Friday and got a response at 8:30pm on a Sunday (you'll get an email and this dashboard will update):
Your new sending quota is 50,000 messages per day. Your maximum send rate is now 14 messages per second. We have also moved your account out of the Amazon SES sandbox.
#5 - send some emails
Here's the core functionality (in Python):
import boto3

response = boto3.client("ses", region_name='us-west-2').send_email(
    Source='hello@contextify.email',
    ReplyToAddresses=['hello@contextify.email'],
    Destination={'ToAddresses': list_of_recipients},
    Message={'Subject': {'Data': str_subject}, 'Body': {"Text": {"Data": str_body}}}
)
You'll want to change the recipients, subject, body, and sending/reply-to email addresses to match your needs.
You can invoke this anywhere within an auth'd AWS instance (a Lambda, an EC2, etc), on your local machine (with ~/. aws/credentials set up) or anywhere that can make an API call (if you stand up a Lambda and expose a private endpoint via API Gateway)
For a full-stack implementation, visit this Github Repo.
Thanks for reading. Questions or comments? 👉🏻 alec@contextify.io