set up this blog
tl;dr: How to make a static website, built on Pelican, Netlify hosting, Netlify CMS, and Github.
cost: $0/mo (<$1/mo w/ domain)
build time: 45 minutes (MVP) / 2.5 hours (with CMS + custom domain name)
why static (vs dynamic) sites
With a personal site, less is really more. If you don't finish building the site, it didn't matter how many bells and whistles it was supposed to have.
Static sites are effectively HTML + Markdown served from some storage source like AWS S3, Dropbox, or in this case, Github. More extensive static sites lean into the JAMstack (JavaScript, APIs, and Markup) more.
Static sites are easy to build, easy to maintain, and (generally) lightning fast.
If you're looking for something more flavorful, with auth, permissions, statefulness, lots of Javascript, and whatnot, check out heavier frameworks like Flask or Django.
#1 - why pelican
This site is built on Pelican, the Python static site builder with the most Github stars. A full listing/comparison of static site generators can be found at StaticGen
Features:
- Simple support for Articles (e.g. blog posts) and Pages (e.g. "About" and "Contact")
- Fast build times (about ~25s)
- Jinja2 HTML logic
- Relatively broad set of themes
#2 - getting started
A template of this build can be found in this Github Repo). If you want to skip the whole tutorial, just run:
git clone git://github.com/alecbw/Build-Pelican-Blog-www.alec.fyi.git website && cd website && pip install -r requirements.txt
and edit the pelicanconf.py
Parts of the setup are adapted from this excellent Guide by Michael Abrahamsen.
#2.1 - set up the folder structure and run through pelican-quickstart
mkdir static_site && cd static_site
#2.2 - create requirements.txt with pelican and markdown
echo $'pelican \nmarkdown' > requirements.txt
#2.3 - install those requirements
pip install -r requirements.txt
#2.4 - go through Pelican Quickstart, which sets many of the options through an interactive CLI. You'll pick a name, title, language, pagination (I recommend off), timezone (list here), if you want a Makefile (I recommend no)
pelican-quickstart
#2.5 - make the subfolders we'll need
mkdir {content/admin,content/images,content/pages,content/posts}
#2.6 - add our specific STATIC_PATHS (and optional TEMPLATE_PAGES) to your pelicanconf.py
PATH = "content"
STATIC_PATHS = ["uploads", "admin", "images"]
# Optional - if you want Netlify CMS
TEMPLATE_PAGES = {"admin/index.html": "admin/index.html"}
#2.7 - setup the git repo itself; you'll need to create a Github repo in the UI (I've called mine static_site)
git init
git add .
git commit -m "Initial commit"
git remote add origin git@github.com:alecbw/static_site.git
git push origin master
#2.8 - setup a .gitignore. You can find helpful templates at gitignore.io. To pull the standard python one, use the below
curl https://www.gitignore.io/api/python > .gitignore
#2.9 create your first post
Create a Markdown file (.md) in your /content folder: content/name-of-post.md
Pelican will format title, date, and whatnot for you if you specify them as follows:
---
title: building this blog
date: 2019-11-25 17:30
tags: software, how-to, bash, python
---
the content of the post
#2.10 - (optional) you can preview it in localhost
pelican content -s publishconf.py
python -m pelican.server
#2.11 - if you preview locally, it will generate some files in the /output folder. The deploy process will create and purge these automatically. After you've finished testing locally, remove the /output files.
rm -r output/*
#3 - setup Netlify
#3.1 - create a Netlify account
#3.2 - add a new site from the GH repo you just made
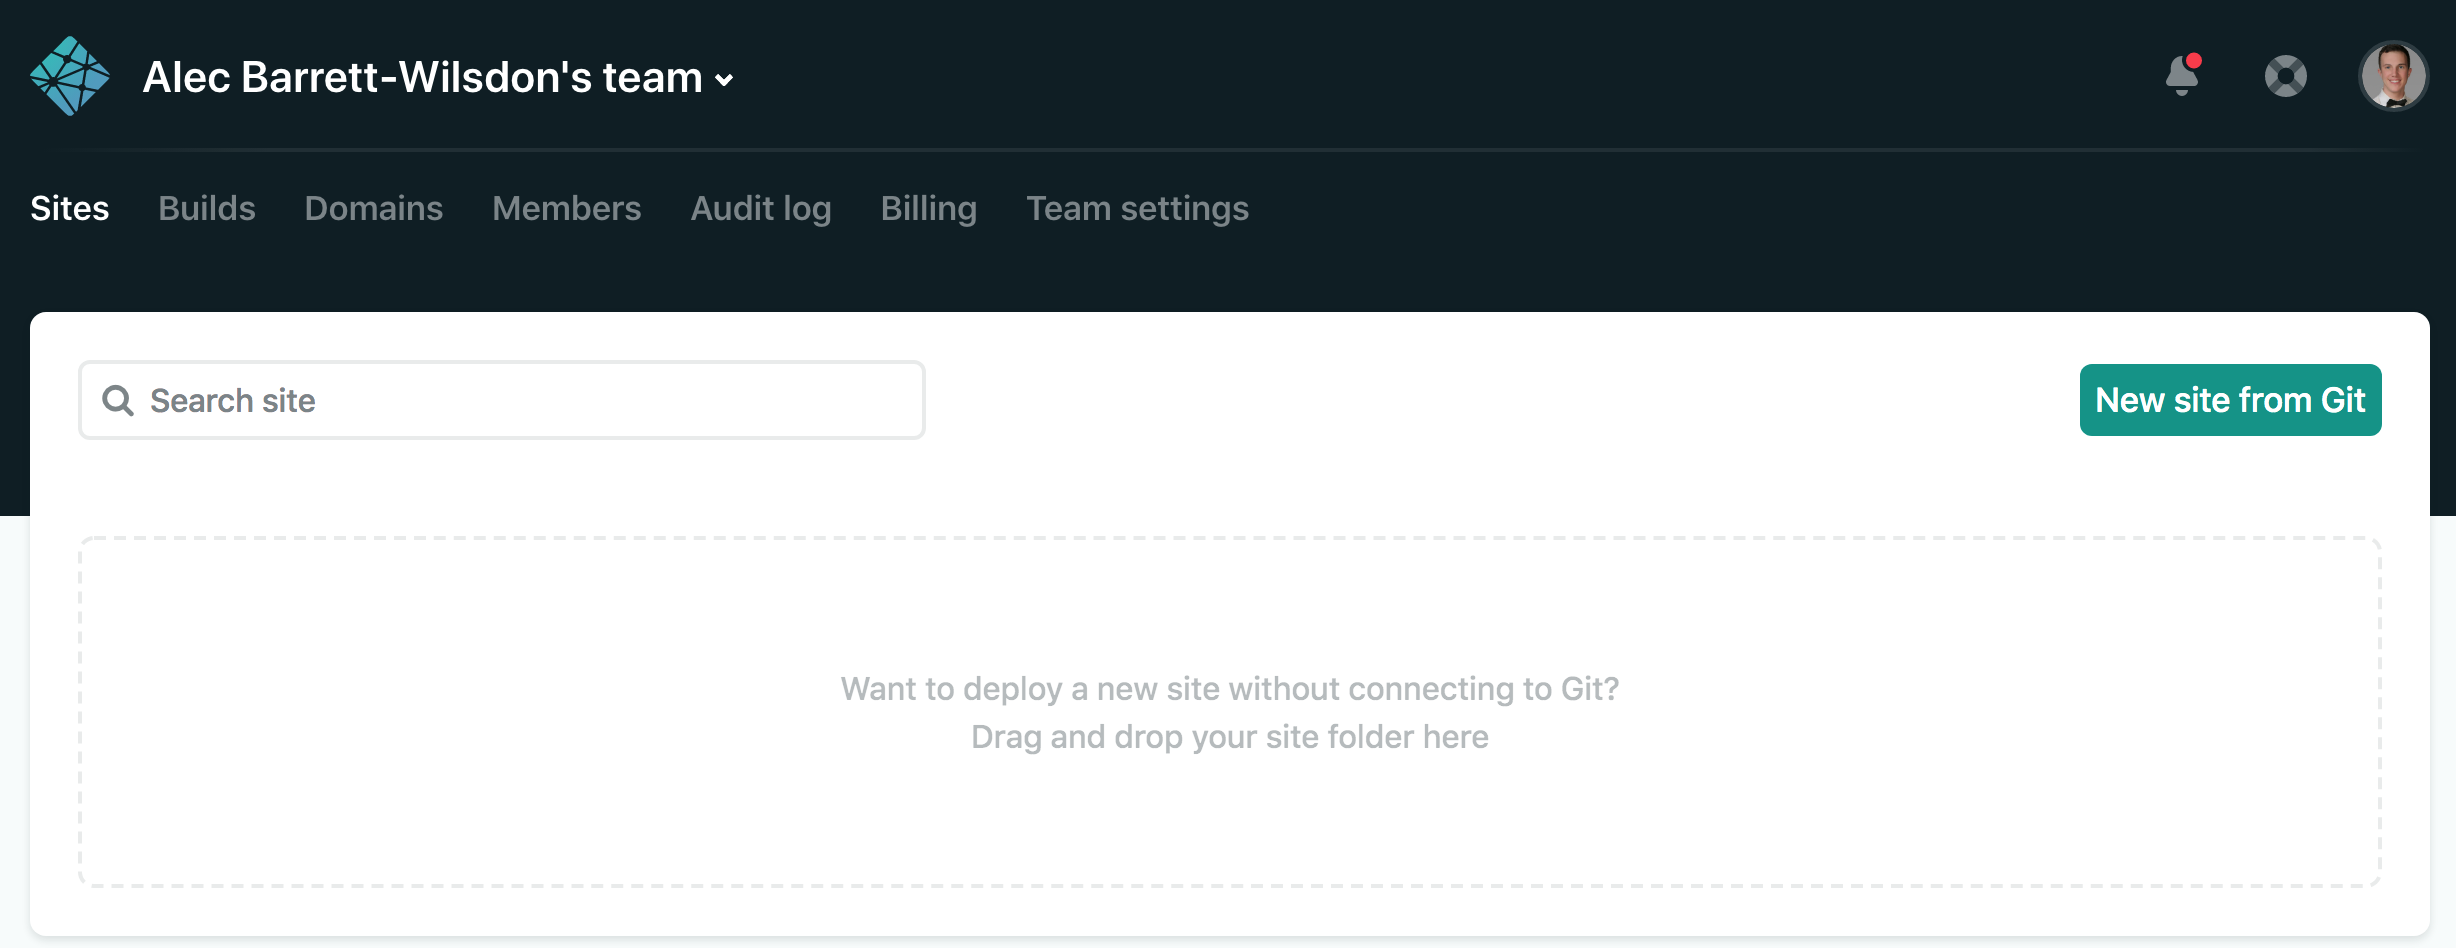
#3.3 - connect to your Github with OAuth.
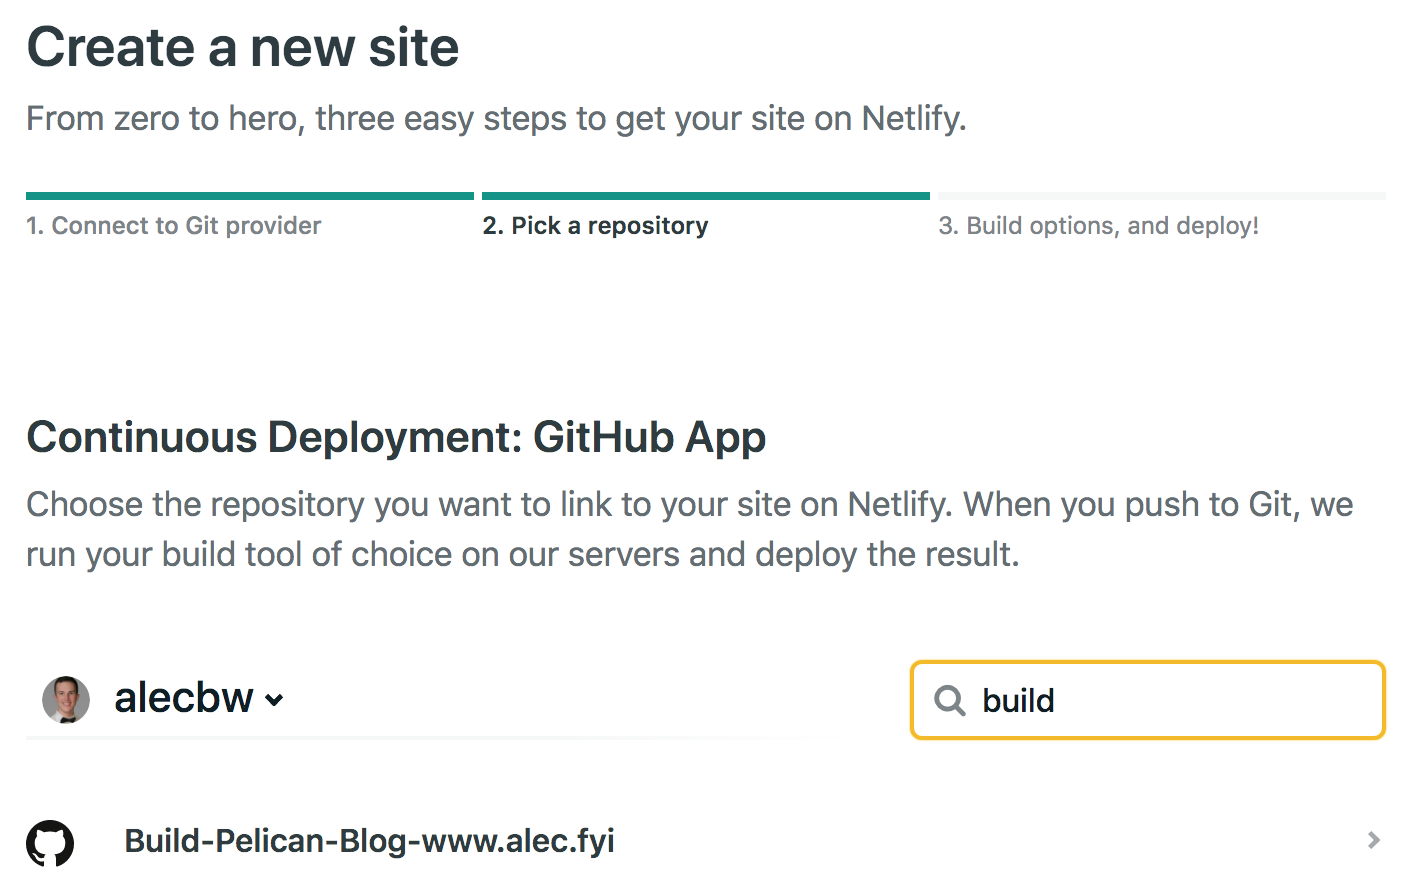
If you'd previously auth'd Netlify, you'll need to enable access to that specific repo (link)
#3.4 - specify the build command and output folder pelican content -s pelicanconf.py output
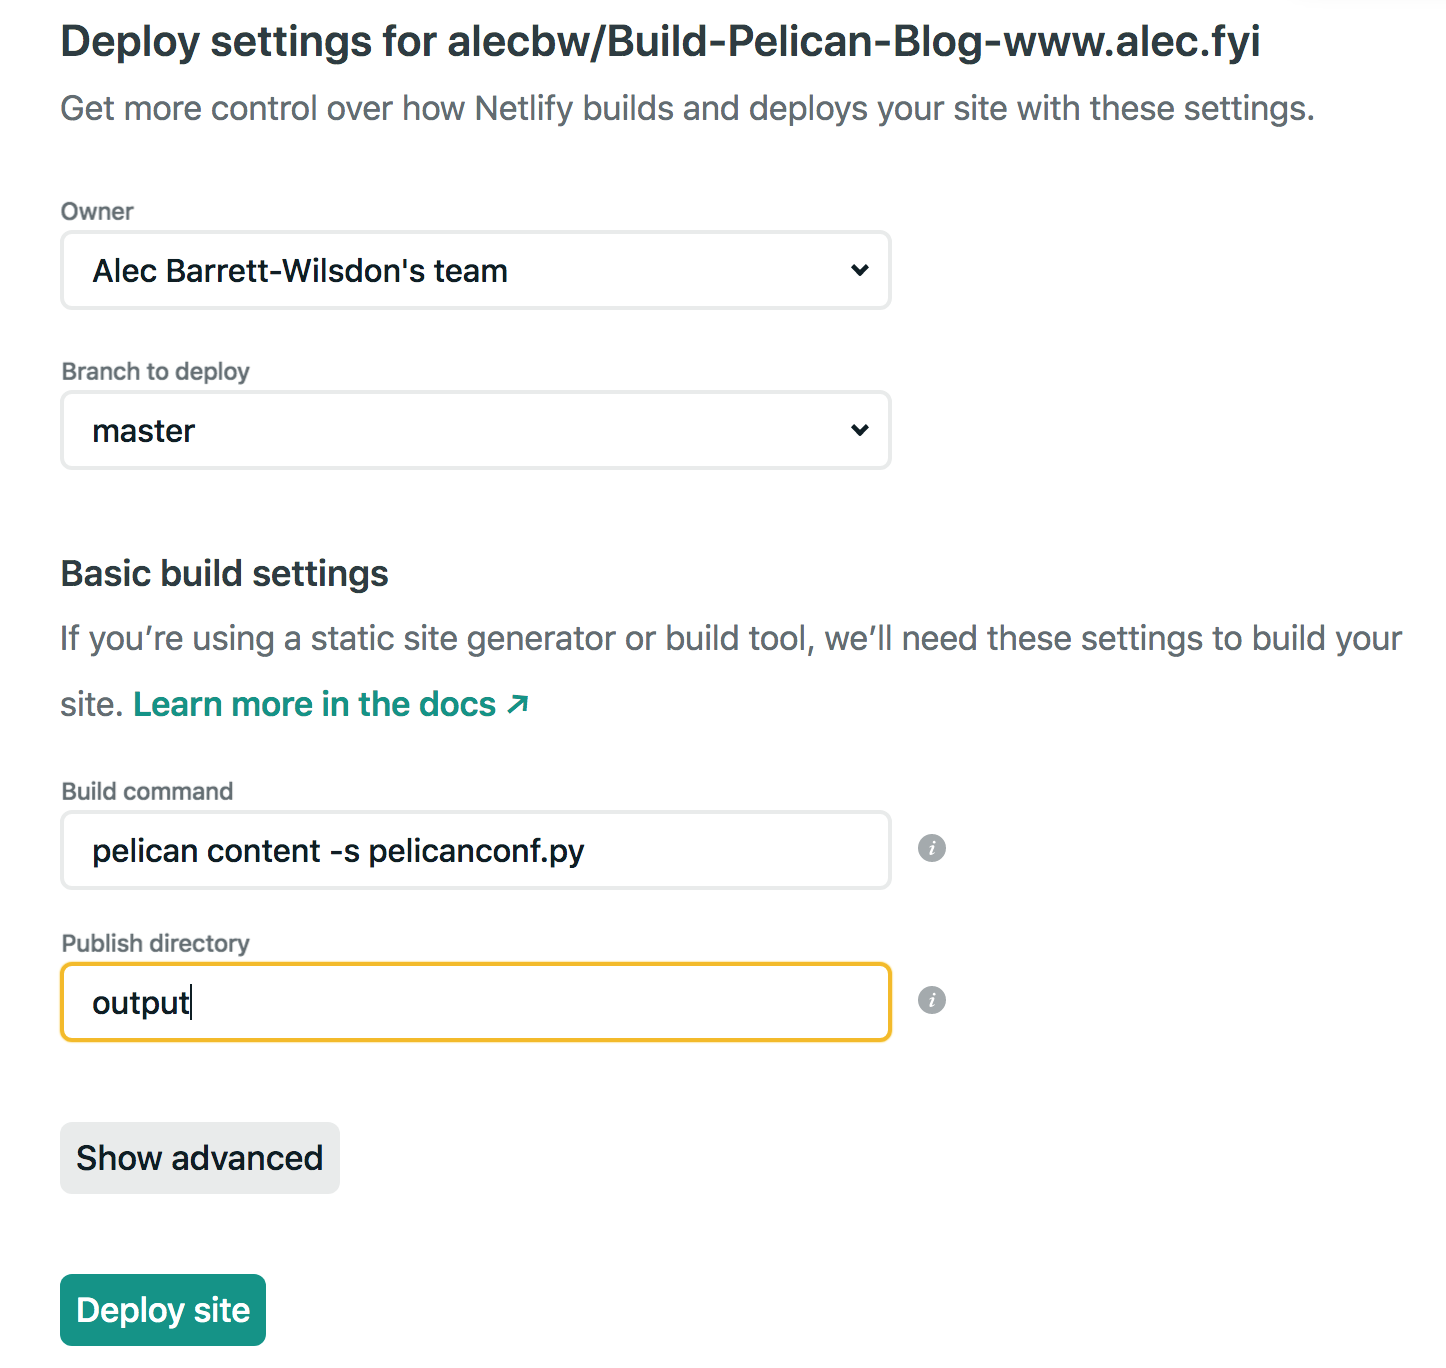
#3.5 - see it in prod (example from the linked GH repo)
Netlify will programmatically generate a url for you. If you want to change it, but not buy your own domain, go to Settings -> General -> Change Site Name to get a different .netlify.com subdomain.
#3.6 - updating the site
Any time you make changes you want on the production site, simply git push
git add . && git commit -m "Testing first article" && git push origin master
You can track the deploy process in the Deploys tab in Netlify. Be aware they may fail sometimes, especially if you make a lot of rapid publishes from the CMS.
You can stop here if you want. Everything that follows is optional.
#4 - (optional) setup custom domain
#4.1 - buy a domain
Netlify will provide you a subdomain. If you want to use your own custom domain, you'll need to buy one and configure it to use the Netlify nameservers (Docs).
#4.2 - 'add' the domain to Netlify

The UX is a bit strange here; click through the second page to the Nameserver records you'll need to add
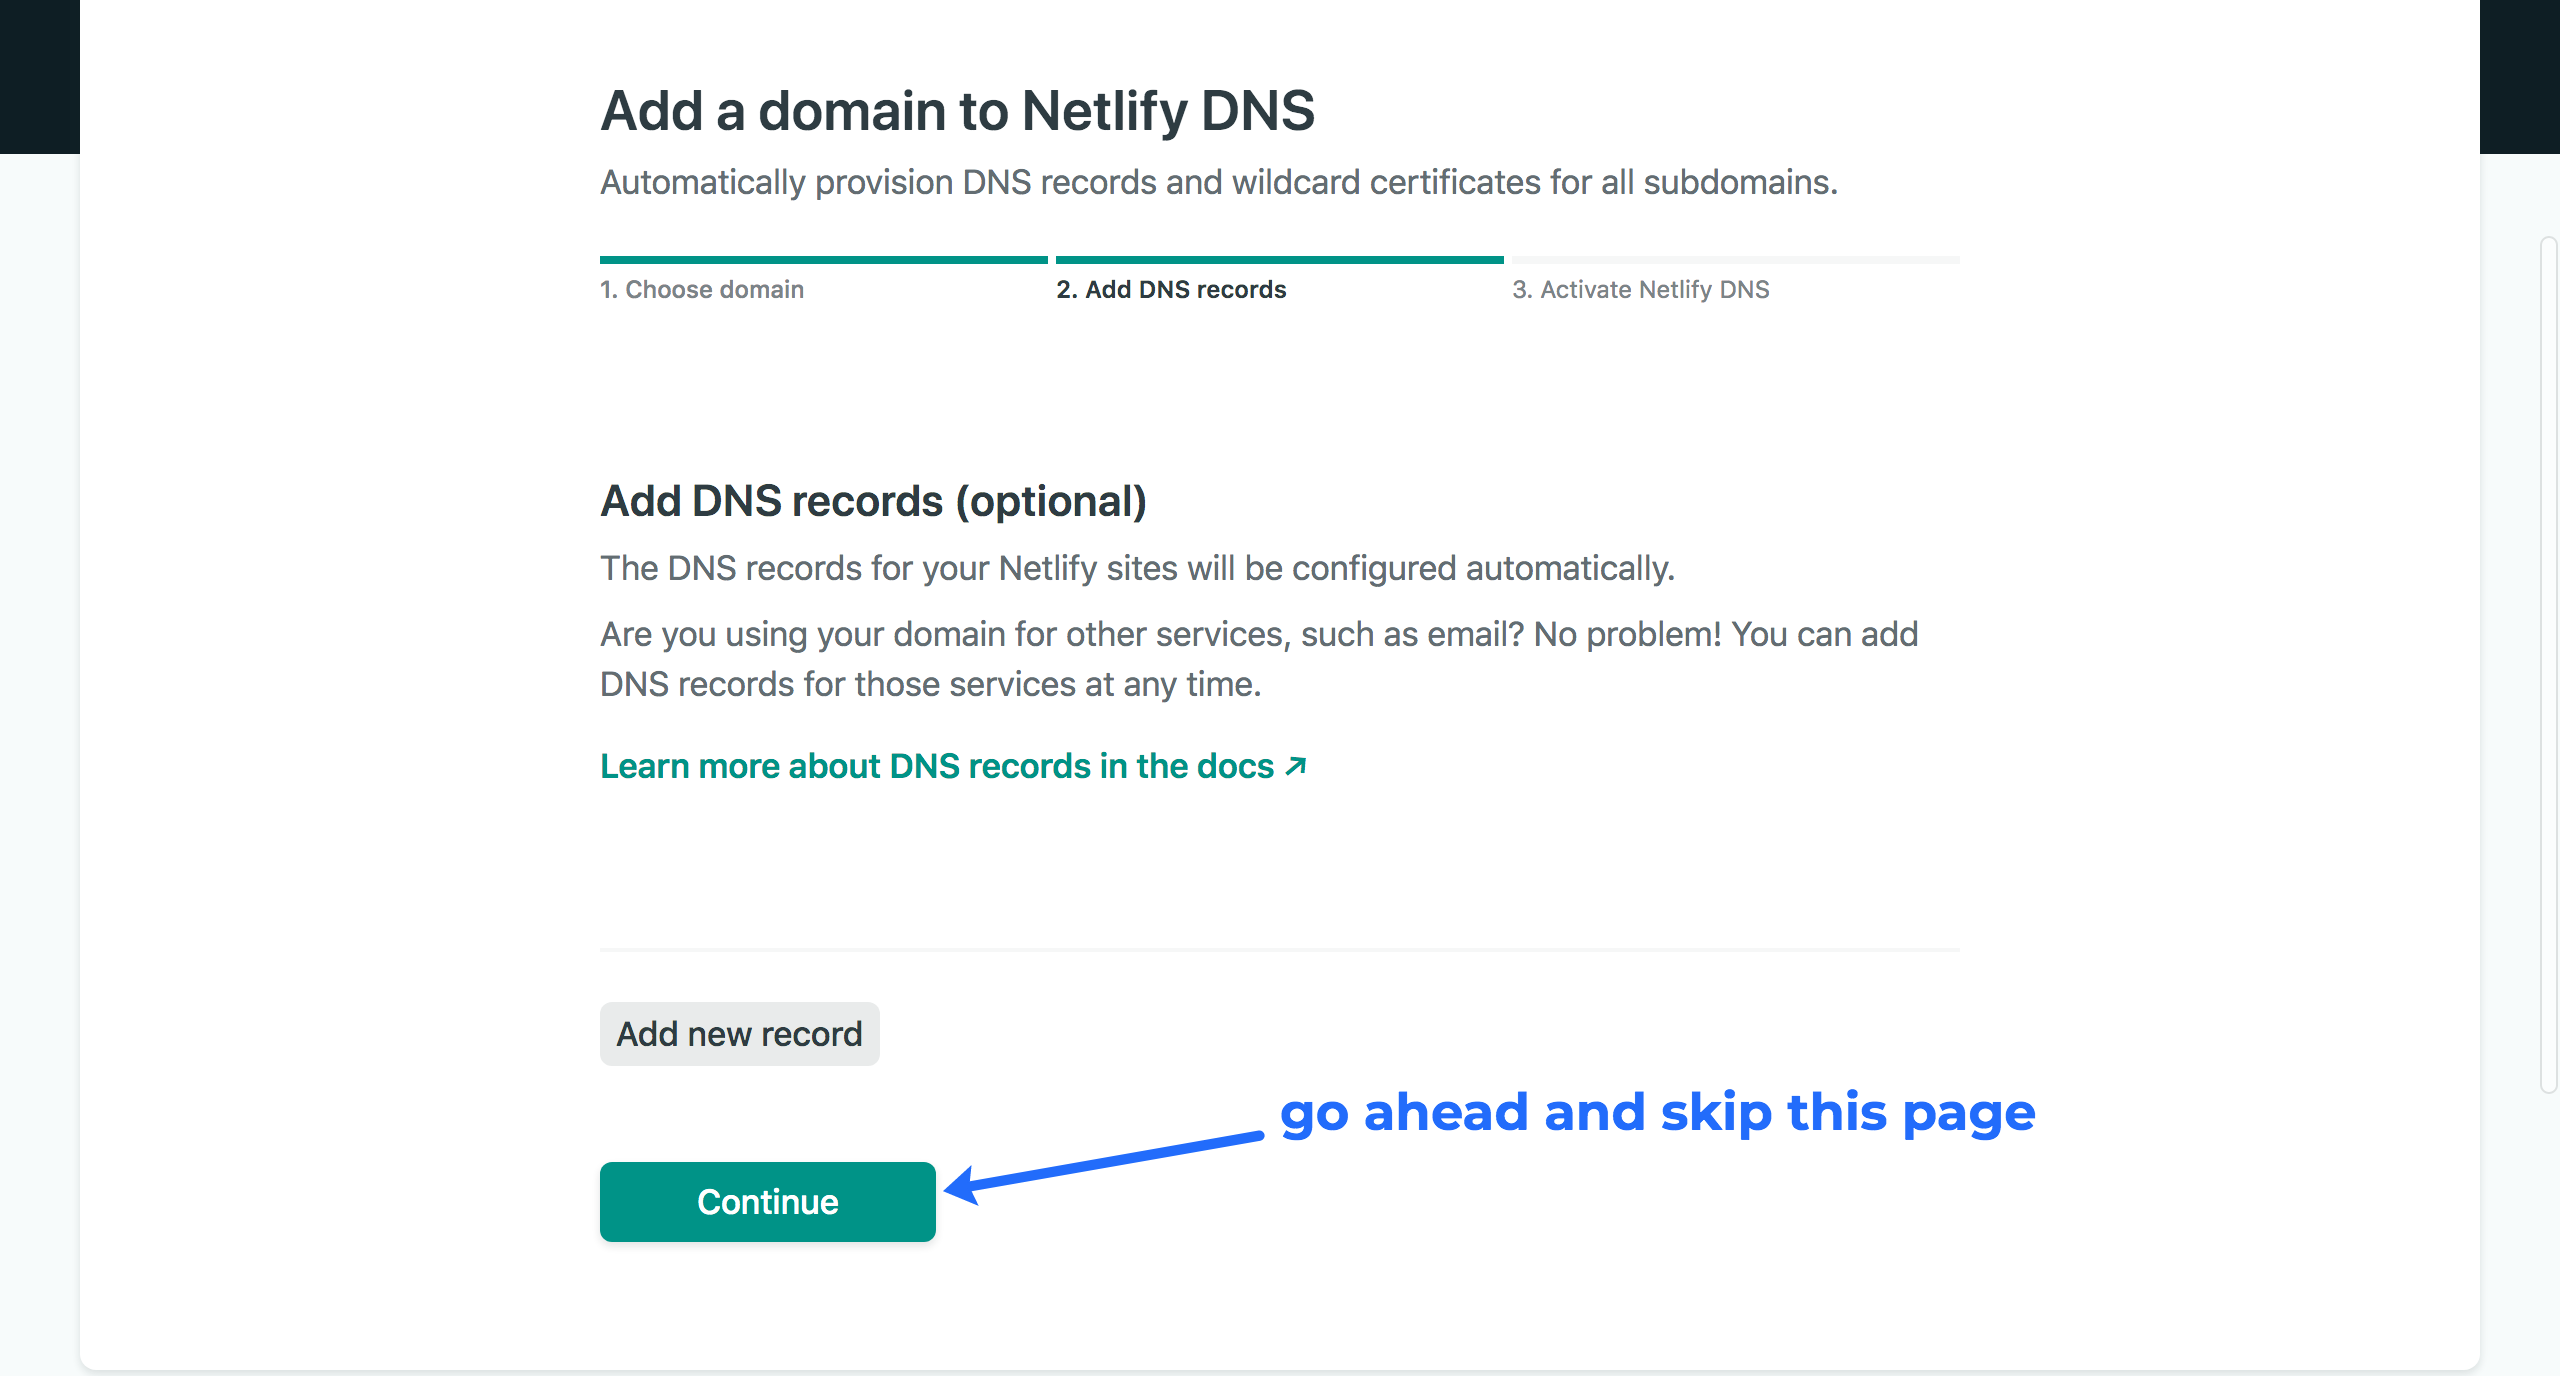
#4.3 - update the NS records on your domain registrar

#4.4 - in Netlify, associate the new domain with the new site
Go to Site -> Settings -> Domain Management and add the domain you just connected
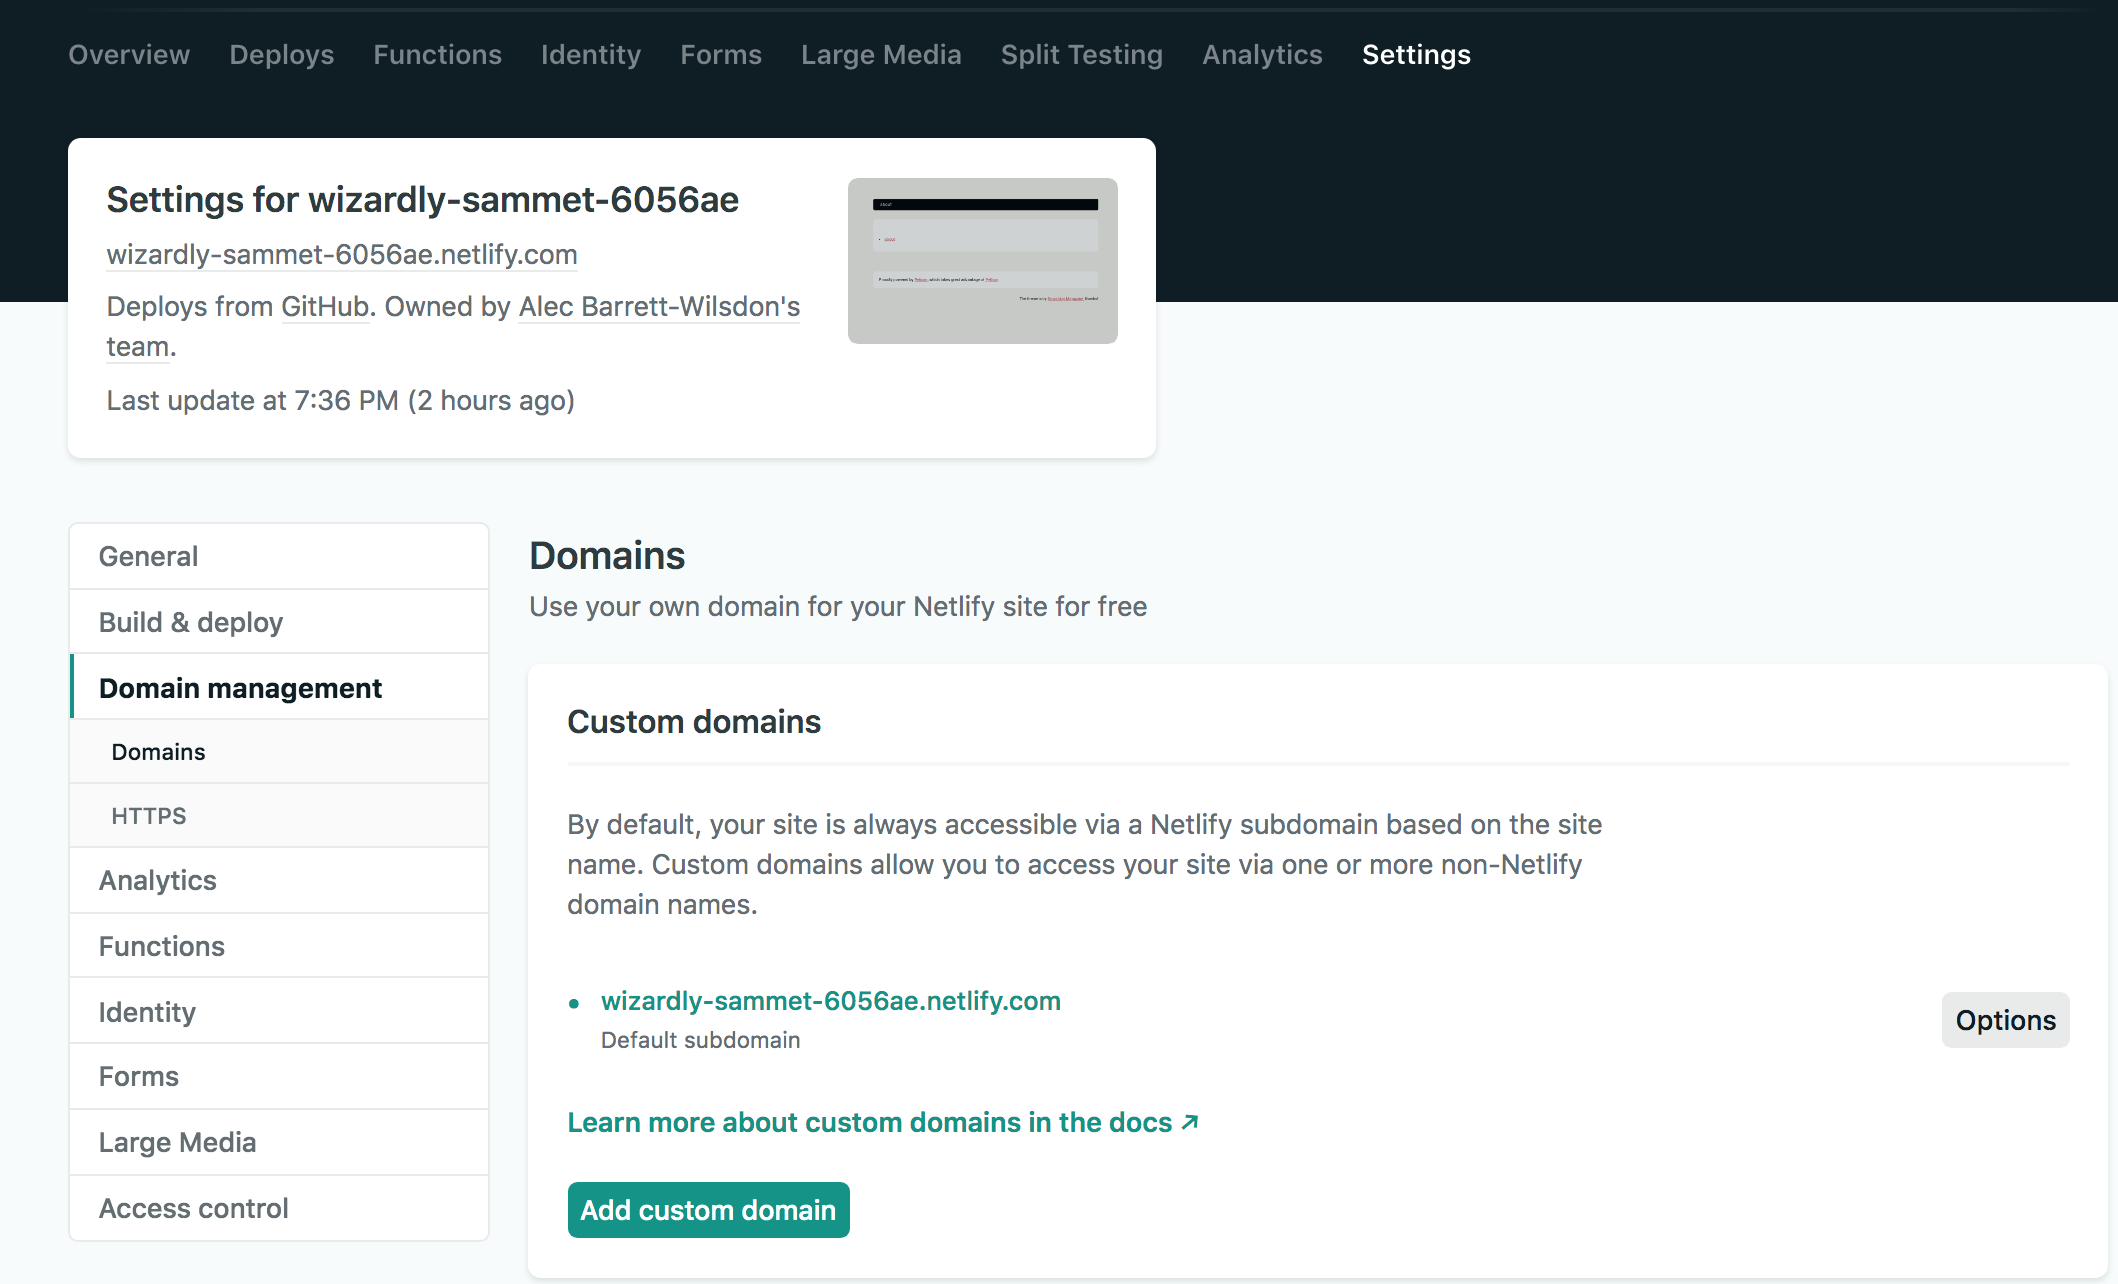
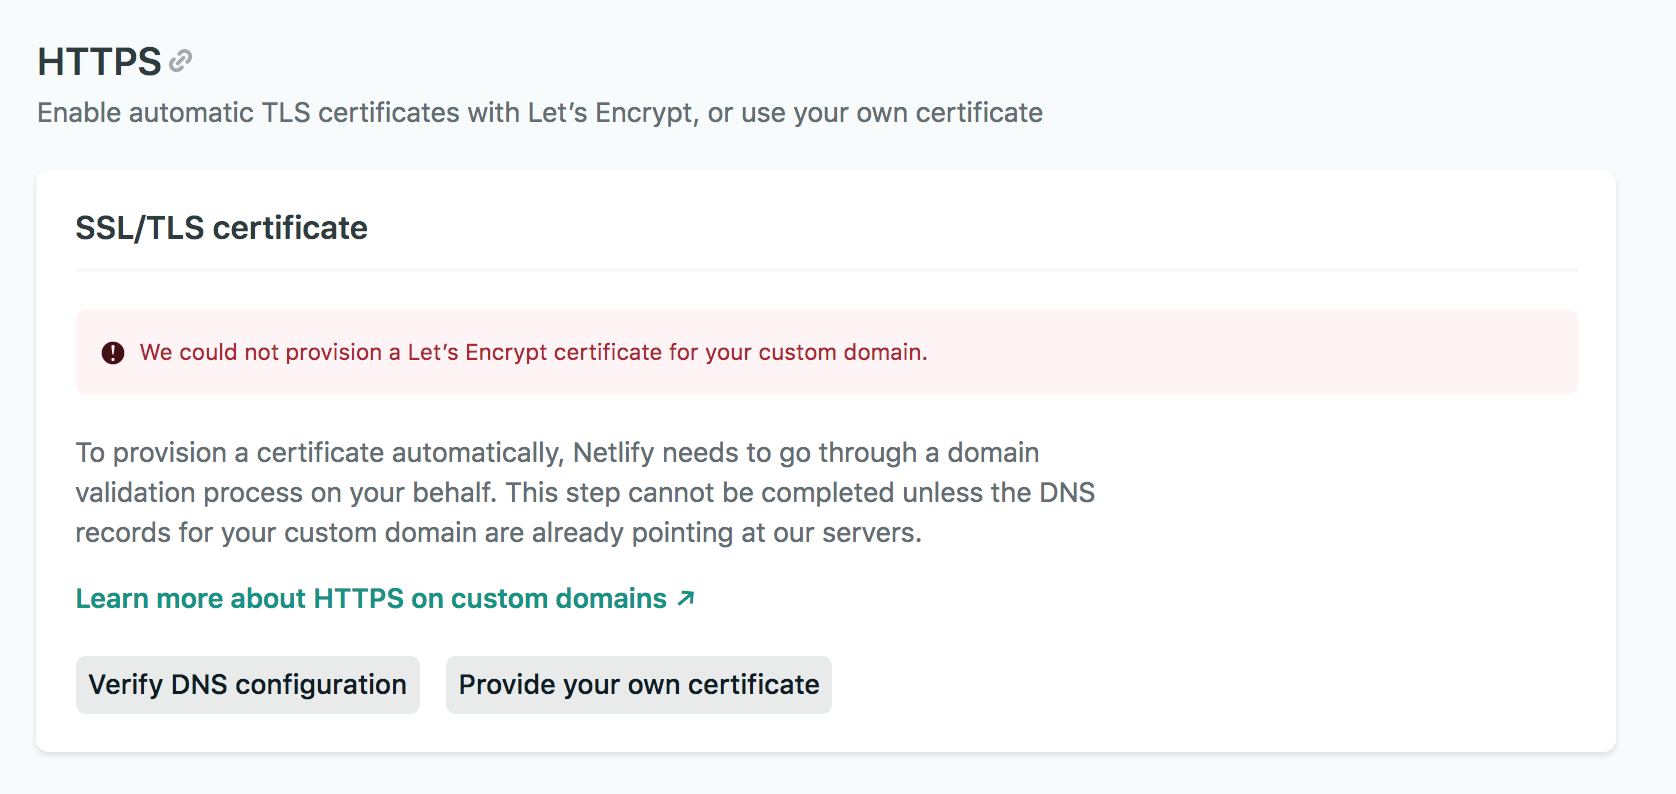
#4.5 - set up HTTPS
Scroll down a little to setup automatic TLS certificates with Let’s Encrypt (for free!)
#5 - (optional) setup Google Analytics
# 5.1 - create a Google Analytics account
# 5.2 - add your GA tag to your pelicanconf.py
GOOGLE_ANALYTICS = "UA-12345678-9"
#6 - (optional) setup Netlify CMS
Netlify provides a Content Management System that makes it (sorta) easier to draft, edit, and publish articles. It is also free
# 6.1 - add admin files
You'll need to add two admin files to enable Netlify CMS. You can copy them from my GH repo:
curl https://raw.githubusercontent.com/alecbw/Build-Pelican-Blog-www.alec.fyi/master/content/admin/config.yml -o content/admin/config.yml
curl https://raw.githubusercontent.com/alecbw/Build-Pelican-Blog-www.alec.fyi/master/content/admin/index.html -o content/admin/index.html
# 6.2 - change the repo in the config.yml (shown below)
backend:
  name: github
  repo: alecbw/static_site # Path to your GitHub repository

publish_mode: editorial_workflow

media_folder: "content/images"
public_folder: "/images"

collections:
  - name: "posts"
    label: "Posts"
    folder: "content/posts"
    sort: "date:desc"
    create: true
    fields:
      - {label: "Title", name: "title", widget: "string"}
      - {label: "Publish Date", name: "date", widget: "datetime"}
      - {label: "Tags", name: "tags", widget: "string", default: "general"}
      - {label: "Body", name: "body", widget: "markdown"}
  - name: "pages"
    label: "Pages"
    files:
      - name: "about"
        label: "about"
        file: "content/pages/about.md"
        fields:
          - {label: "Page Title", name: "title", widget: "string"}
          - {label: "Body", name: "body", widget: "markdown"}
The content/admin/index.html is simply a viewport for the Admin login to the CMS
# 6.3 - images
If you intend to use any images, make sure you add one to your local /images folder and git push it to prod. The CMS will hang indefinitely when trying to upload or find images unless you seed it with a .jpg/.png etc manually first
# 6.4 - setting up Github OAuth for the CMS
Generate a new Github id + secret
Go to Settings -> Access Control -> OAuth and add it Docs.
You can now OAuth into the Admin CMS
# 6.5 - workflow
The login will be your-site.tld/admin
You can create and stage drafts and manage them through the Netflix CMS Netlify will create a branch and push new commits every time you change that branch. When you go to publish, it will PR the branch to Master.
# 7 - (optional) themes
The Pelican community has created 150 or so free themes that you can use. Docs are here; a list of themes is here
# 7.1 - to install a theme
pelican-themes -i "$(pwd)/themes/THEMENAME"
and then update your pelicanconf.py
# 7.2 - some themes I like:
- Atilla
- Nikhil
- Pelican Bootstrap
- HSS
- Pelican-Sober (this site uses this)
Thanks for reading. Questions or comments? 👉🏻 alec@contextify.io