set up Twilio SMS to Email
tl;dr: set up a pass-through phone number that forwards to anywhere
cost: $0.0075 per inbound SMS
build time: 15 minutes (MVP)
overview
Think of all the times you've had to submit a phone number to get a promotional code, or an ebook download, or the love of your life at a bar.
In many cases, you end up subscribed to lists that are quite difficult to opt out of. Anyone who's made a political donation is familiar with the wave of unsolicited SMS's they get every election season.
In the below walkthrough, I'll detail setting up a virtual phone number with Twilio, creating a webhook handling Lambda function, and forwarding incoming SMS and phone calls to an email address. You can then create rules to filter them from there.
If you're more familiar with SendGrid and Node.js, I recommend you check out this Twilio tutorial instead.
This article assumes you've already set up AWS SES email sending. If you haven't, read this guide I put together first.
#1 - setting up Twilio
#1.1 - create an account here
#1.2 - complete 2FA auths
It will make you confirm both an existing email and existing phone number. Go through the 'ahoy' onboarding as well.
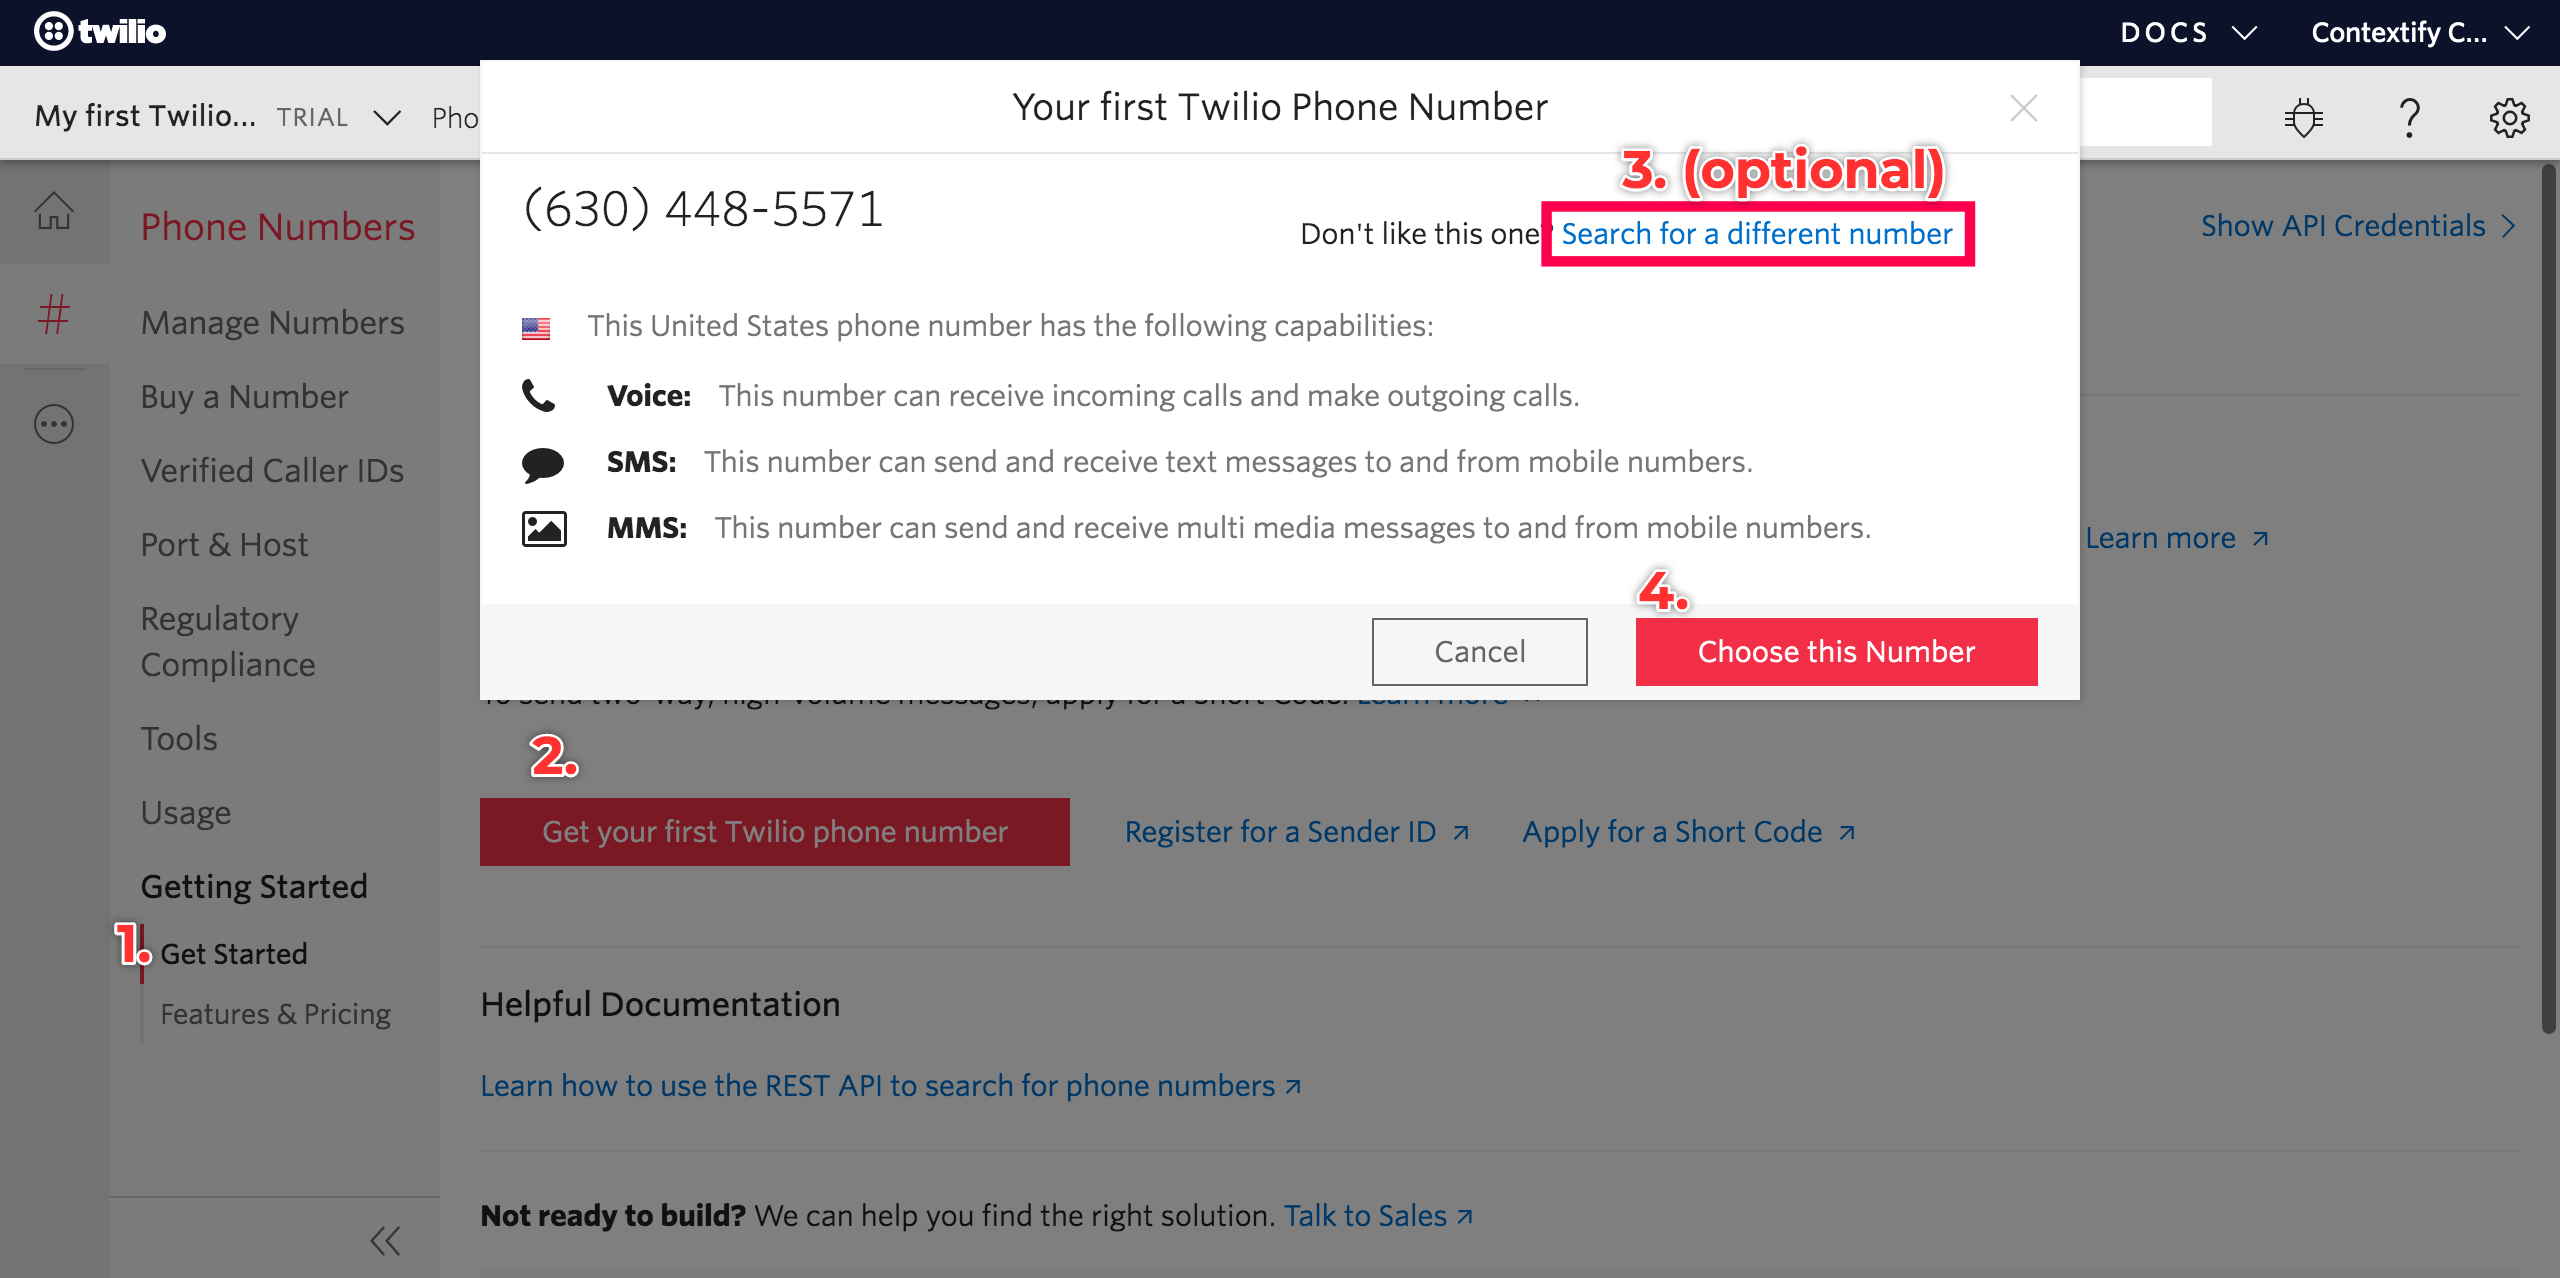
#1.3 - set up a new phone number here

The menu pathing is [Phone Numbers -> Active Number -> Get Started -> Get your first Twilio phone number]
#2 - setting up the webhook
Setting up a webhook that waits for data is as simple as standing up an API Gateway instance that can accept POSTs and attaching a Lambda to it.
#2.1 - clone the Github repo
git clone git@github.com:alecbw/Twilio-SMS-To-Email-www.alec.fyi.git
(rename the top level directory to be whatever you want)
#2.2 - (optional) change variable names in serverless.yml
You can keep the defaults or change the service (CloudFormation stack) name, AZ region, and function name and API endpoint path
service: public-facing
... truncated...
provider:
    region: us-west-1
... truncated...
functions:
  twilio-webhook:
    handler: twilio_webhook_handler.lambda_handler
    events:
      - http:
          path: /twilio_webhook
          method: post
#2.3 - deploy the stack (change NAMEOFTOPLEVELDIRECTORY)
cd NAMEOFTOPLEVELDIRECTORY && sls deploy
#2.4 - get endpoint URL
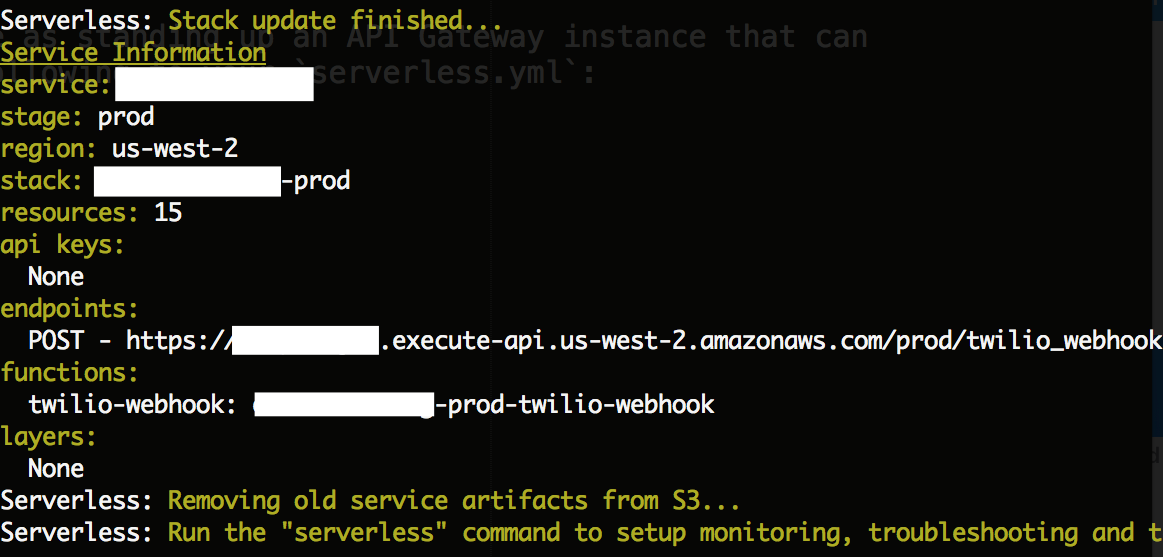
When you deploy, the serverless CLI will output the newly generated API endpoint:

For simplicity, we are not making this API endpoint private (API Key protected). Be sure not to share or leak your endpoint address! If someone spammed it with hundreds of thousands of requests, it could get somewhat expensive (and destroy the deliverability of your email sending domain).
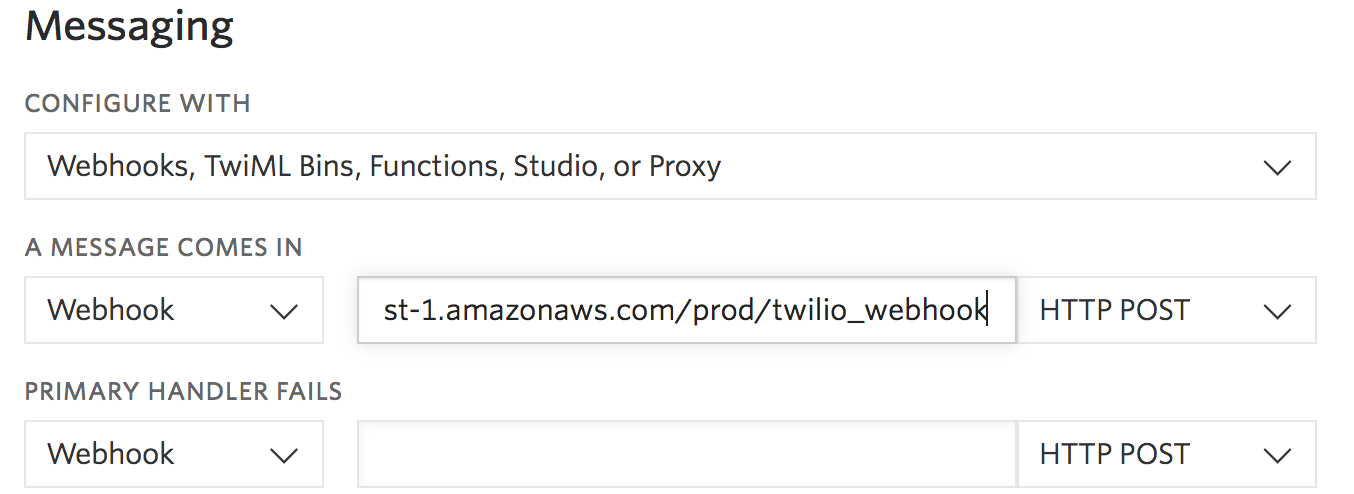
#2.5 - add that endpoint to Twilio
The pathing is Phone Numbers -> Manage Numbers -> Active Numbers -> [click on your number]
Scroll down to the webhook options.

#2.6 - add a balance to your Twilio account
The minimum is $20. That'll get you 2,666 inbound texts.
You can stop here if you want. Everything that follows explains how it works
#3 Lambda handler logic
Twilio passes data about the call/text in the body of the API request. Do note: inside that data is another key:value pair called body which holds the contents of the message.
'body': 'ToCountry=US&ToState=CA&SmsMessageSid=SM823cbdcd8c79d6c4a43b2bd9e4bc5c9e&NumMedia=0&ToCity=&FromZip=94109&SmsSid=SM82390dsc79d6c4a43b2bd9e4bc5c9e&FromState=CA&SmsStatus=received&FromCity=SAN_FRANCISCO&Body=Test+Works!&FromCountry=US&To=%2B10987654321&ToZip=&NumSegments=1&MessageSid=SM823cbdcd29306c4a43b2bd9e4bc5c9e&AccountSid=AC0f7ad2e4fbcc15f6e36bf33a57475ffb&From=%2B12345678900&ApiVersion=2010-04-01',
You can map it to a dictionary as if it were a querystring:
body_dict = {x[0]:x[1] for x in [x.split("=") for x in event["body"].split("&")]}
You'll then want to make it human readable. I suggest converting to string with pretty print
import pprint
invocation_dict = {
    "Subject": f"Received SMS: {datetime.now().strftime('%m/%d/%Y, %H:%M:%S')}",
    "Body": pprint.pformat(param_dict),
    "Recipients": ["recipient@your-domain.com"] # Has to be a list
}
Then it's up to you how to send that with SES (the two approaches are covered below)
#4 email sending
#4.1 - if you have a separate email-sending Lambda
If you went through the earlier SES article, you should have an email sending Lambda set up. In which case, you can use Lambda <> Lambda Invoke to send the Twilio webhook data.
Below I've included a Lambda Invoke helper function that checks for and handles all conceivable errors. Feel free to use just the lambda_client and lambda_response lines if you prefer simplicity.
import boto3

def invoke_lambda(params, function_name, invoke_type):
    lambda_client = boto3.client("lambda")
    lambda_response = lambda_client.invoke(
        FunctionName=function_name,
        InvocationType=invoke_type,
        Payload=json.dumps(params),
    )
    # Async Invoke returns only StatusCode
    if invoke_type.title() == "Event":
        return None, lambda_response.get("StatusCode", 666)

    string_response = lambda_response["Payload"].read().decode("utf-8")
    json_response = json.loads(string_response)

    if not json_response:
        return "Unknown error: no json_response. Called lambda may have timed out.", 500
    elif json_response.get("errorMessage"):
        return json_response.get("errorMessage"), 500

    status_code = int(json_response.get("statusCode"))
    json_body = json.loads(json_response.get("body"))

    if json_response.get("body") and json_body.get("error"):
        return json_body.get("error").get("message"), status_code

    return json_body["data"], status_code


request_data, request_status = invoke_lambda(
    invocation_dict,
    "STACKNAME-prod-send-email",
    "RequestResponse"
)
#4.2 - (alternately)
If you have set up SES but don't want to maintain a separate handler for email sending, you can add the core functionality to the webhook (instead of the Lambda Invoke)
import boto3

response = boto3.client("ses", region_name="us-west-2").send_email(
    Source="hello@your-domain.com",
    ReplyToAddresses=["hello@your-domain.com"],
    Destination={"ToAddresses": invocation_dict["Recipients"]},
    Message={
        "Subject": {"Data": invocation_dict["Subject"]},
        "Body": {"Text": {"Data": invocation_dict["Body"]}}
    },
)
#4.3 - validate
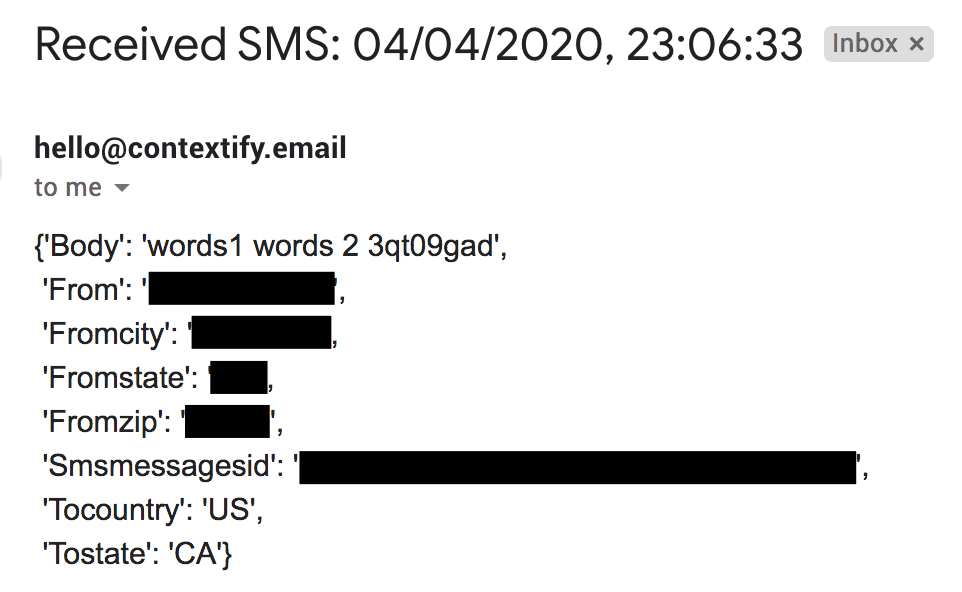
send a text to your phone number and check your receiving email. It should be in the format of

The Github Repo with all the code in this article can be found here
If you made it this far and felt the above implementation was too involved or technical, know you can recreate the functionality in Zapier:
- Catch Hook (by Zapier)
- Send Outbound Email (by Zapier)
[it does require you to be on the $20/mo plan though]
Thanks for reading. Questions or comments? 👉🏻 alec@contextify.io